On Boarding - Seller Central
To Give User Permissions on Amazon Seller Central:

Add user to Seller Central
1. You (account owner) need to login to your Amazon Seller Central account.
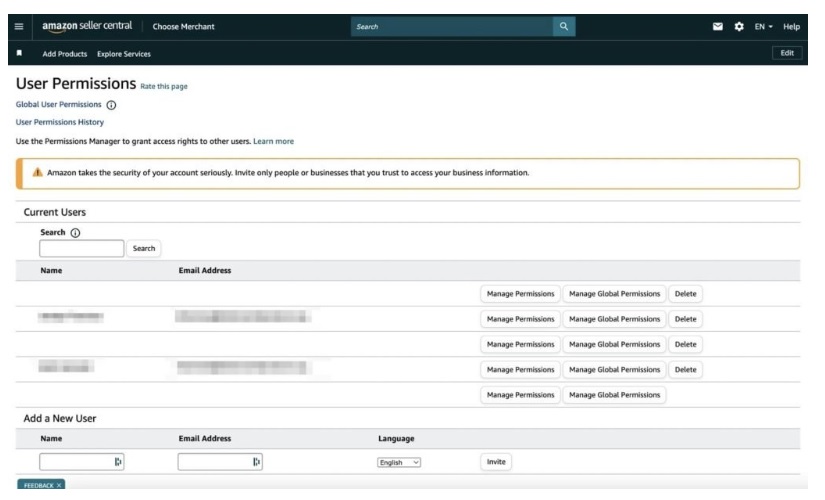
2. Hover your mouse to “Settings” located on the top right and select “User Permissions” in the drop-down menu.
3. Type in the Name and Email address in the blank field and click “Send Invitation”.

After you sent the invitation, the name of the person you invited will show up in the “Open Invitations” field. You can either resend or delete the invitation by clicking the buttons in line to it.
The invited user will receive the confirmation in a matter of seconds and if the invited user doesn’t see it, he can either check it in the Spam or Promotions folder.
4. Once the invited user has accepted the invite, the name will show up in the “Current User” area.
5. By then, you can manage the user’s access to your account by clicking the “Manage Permissions” button.
Note: By default, the user doesn’t have any permissions yet until you assign them one. You (account owner) have to go back in and assign permissions after the user has accepted the invitation.
6. Once you’re done selecting the permissions that you wish to grant, click continue to save and confirm the permissions granted.
How to Set Basic User Permissions in Seller Central
Once the user has accepted the invitation, you can begin setting their permissions.
1. Click on “Manage Permissions” for the user you want to do this for.

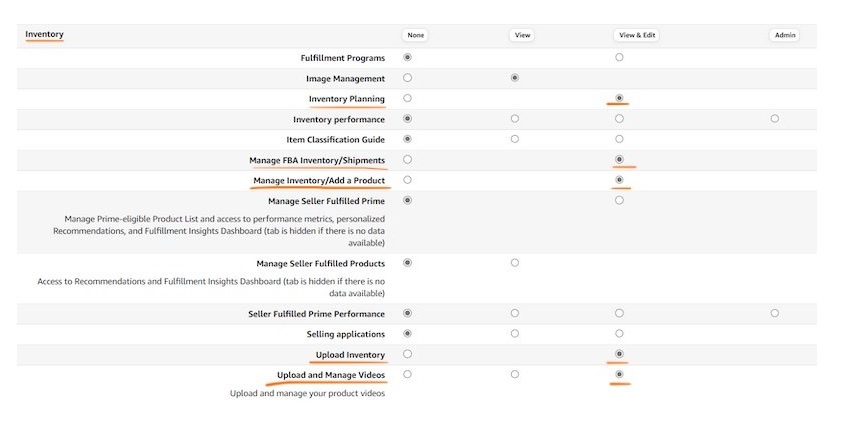
2. You need to set permissions to Admin. If only View & Edit is available select that instead. complete each section and save at the bottom of the page.

How to Set Global User Permissions for Brand Analytics Access
For some reason Amazon has added a second option that needs to be selected in order to give someone access to your brand analytics. Not only do you give them access under reporting but also under “Global User Permissions”.
Please note that this can only be done on the master admin account (email the account was created with).
1. Go back to the User Permissions page
2. Click on “Manage Global Permissions”

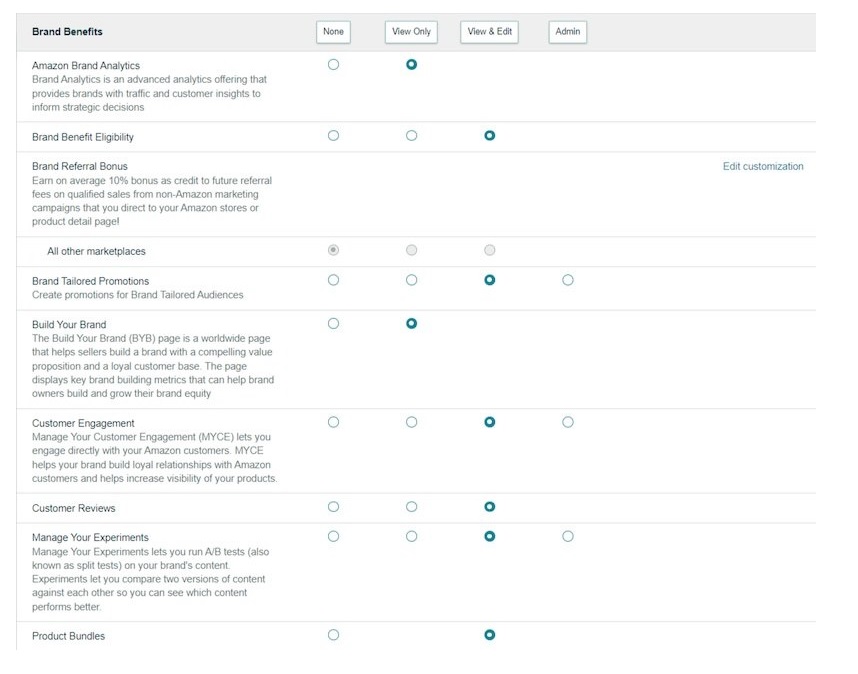
3. Set the Permissions to View or View/Edit or Admin if available for all items.
You can manage permissions for Brand Benefits – anything related to the Build Your Brand section which includes creating product bundles, brand analytics and even running A/B tests through Amazon’s Manage Your Experiments.

We hope this step-by-step tutorial made it easy for you to understand how to invite a new user and set permissions in Seller Central.